Gateway - using a Raspberry Pi
The LoRaWAN gateway is the 'gateway' to the network. All radio traffic from LoRa nodes is picked up by gateways in the network and forwarder to the network (router, handler and other parts that make up the network).
Since LoRaWAN networks are still under development gateways are sparse. You may want to add your own gateway to the network (TheThingsNetwork) so that your nodes can communicate with the network - and your application.
A Raspberry Pi is the easiest way to quickly create a gateway. Just add a 'radio concentrator' board, get some software from github and you're done.
I use the LoRaWAN Raspberry Pi board from LinkLabs. This is currently the only plug & play solution that I know of that is available today. Buy the board directly from LinkLabs or via Amazon Europe (link).
Preparing the Raspberry Pi

The install script is based on the current Raspbian Jessie release. Download the image from the Raspberry Pi website and install this on a micro-SD card. Be sure to use a high speed card (class 10). On a slower card you're bound to wait hours for updates to install...
At the time of testing the 2016-05-10 release was the newest release but this one is just replaced with the 2016-05-27 release, the release notes don't show any problems but as always: YMVV ...
Somehow things that worked perfectly well in previous releases are suddenly changed. The (old) sysvinit is now replaced with the systemd. I found a description on stackexchange on how to disable this but this somehow does not work on my system. The ultimate solution that does work is to just remove the /lib/systemd/system/^Crial-getty@.service file. I jut moved this file to /root to make it a bit less permanent.
Do not use raspi-config to disable the login on the serial console. This seems to remove the complete support for the serial port. The /dev/ttyAMA0 device still exists but there is no response from the device on my system.
The Raspberry-PI-Link-Labs-LoRaWAN-Gateway page on github from Jac Kersing shows all the necessary steps to take.
I used raspi-config to disable graphical boot mode, enable SPI, configure my timezone and set the locales. This removes the need to follow the dpkg-reconfigure steps.
Removing all desktop related packages is optional but it is a good idea to create a new user.
Note, the github archive from Mirakonta links to the original Semtech archive. Semtech changed the interface of the packet forwarder but since this is not (yet) supported by TTN the archive from Jac Kersing must be used.
Installing the gateway software
The gateway software comes from SemTech and is split up in two parts: lora_gateway contains libloragw, the library that communicates with the radio module, and packet_forwarder contains the packet forwarder software that forwards packets to the server.
Just follow the instructions on the github web page: clone the archive from Jac Kersing and run the install.sh script. This will download all files needed from github onto your Pi, compile the whole thing and install the binaries. It also adds the start.sh file to systemd to make sure the gateway starts as soon as you reboot your Raspberry Pi.
Since I am using this gateway for testing and development purposes, I disabled this service with the following command:
Configuring your gateway
Configuration of the gateway is easy. Just open /opt/linklabs/bin/global_conf.json and go all the way to the bottom of the file. There you have to fill in the proper values for the server_address, server_port_up, server_port_down and your gateway_ID.
For the gateway_ID you can provide the MAC address of your Pi. This is what the install script is supposed to do, but due to a small bug the local_conf.json file is missing and you have to add the information manually in the global configuration file.
When you are done, the information should look like this:
    "gateway_conf": {
        "gateway_ID": "b827ebFFFExxxxxx",
        /* change with default server address/ports, or overwrite in local_conf.json */
        "server_address": "staging.thethings.network",
        "serv_port_up": 1700,
        "serv_port_down": 1700,
With the xxxxxx part replaced with the last 6 digits of your own MAC address.
You can show the MAC address on your Pi with the command:
ip link show eth0
powering
I am not a big fan of the micro USB power connector. USB connectors tend to have a fairly high contact resistance, cables are too thin and the voltage delivered by wall adapters is sometimes way below 5v.
The complete system draws around 600 mA. The red LED on the Raspberry Pi is only lit when the input voltage is high enough. As soon as the voltage drops below a given value the LED goes off and all kinds of strange things may happen ... I've had strange errors, spontaneous reboots and even a micro-SD card that was not written correctly - this resulted in a broken Raspbian image that did not boot anymore.
Note that this has nothing to do with the LinkLabs board but everything with the way the Raspberry Pi is powered.
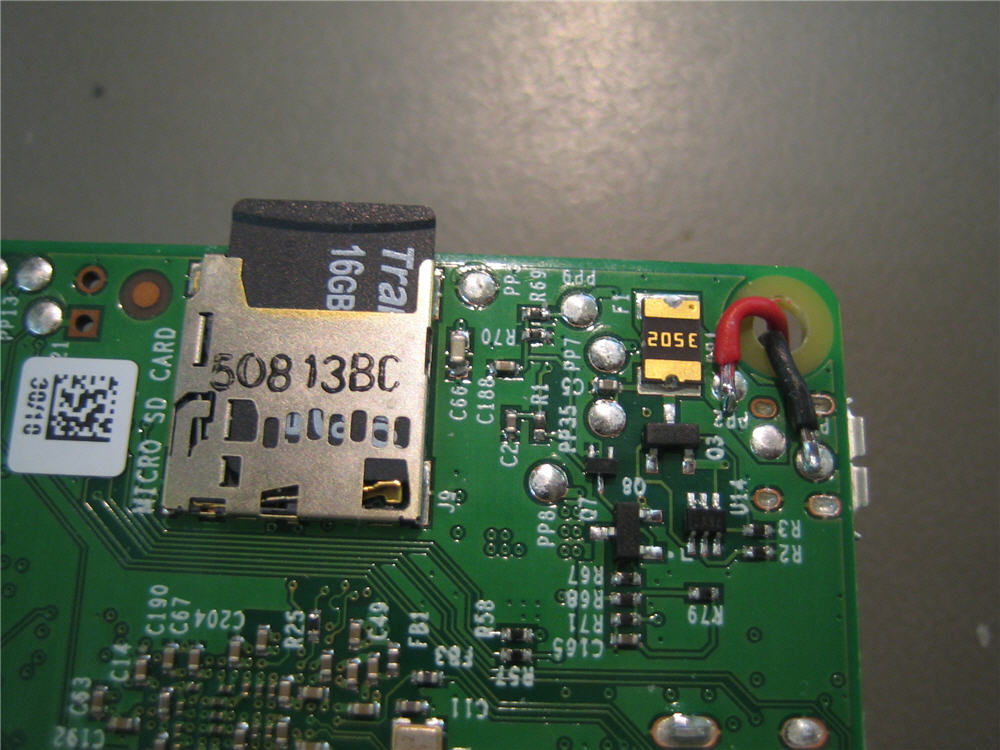
When you can, solder two wires to test points at the bottom of the Raspberry Pi to power it directly from a 5V supply. I use a 12V or 24V supply and a small step-down converter. This allows me to use long cables without the risk of loosing power on the Raspberry.
As shown in the photo below (click for larger view), you need to solder the wires to the test points directly below the micro-USB connector. Black = Gnd, Red = +5V.
It might be tempting to find some standard Raspberry case to mount your gateway into.
Don't!
One reason is that most cases will prove to be too small, a better reason is the heat developed by the system.
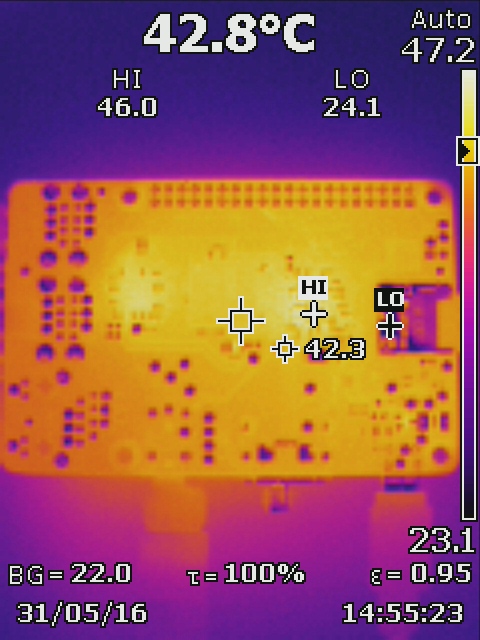
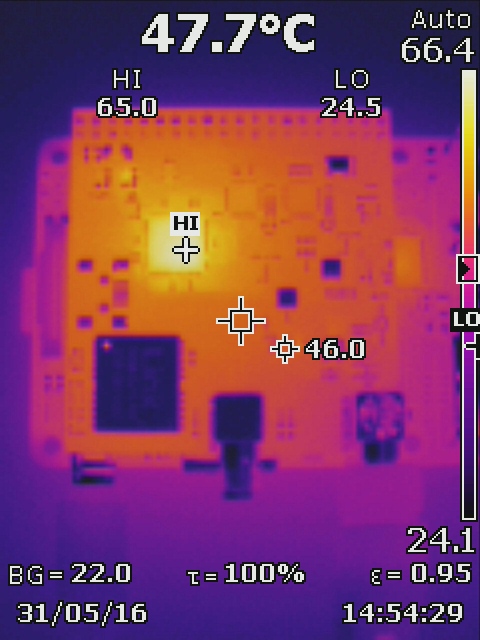
The Raspberry gets warm, the LoRa board gets warmer...
Just have a look at the two thermal images below. The bottom side of the Raspberry has a hot-spot of 47°C where the microprocessor and the USB hub are located. The sx1303 on the LoRa board heats up to 66°C. Note that this is with the bare board on my desk, it gets even warmer when you enclose the whole system in a housing without a fan.
Housing
I needed some housing for the gateway. Preferrably something compact since I am using it as a development tool to develop my own nodes.
It's good to have a local shop that sells Rasberry Pi stuff. They have a case for the HiFiBerry+ board that almost fits. A hole for the fan and larger holes for the antenna connectors were quickly added in the drawings and after some CNC milling this is the result:
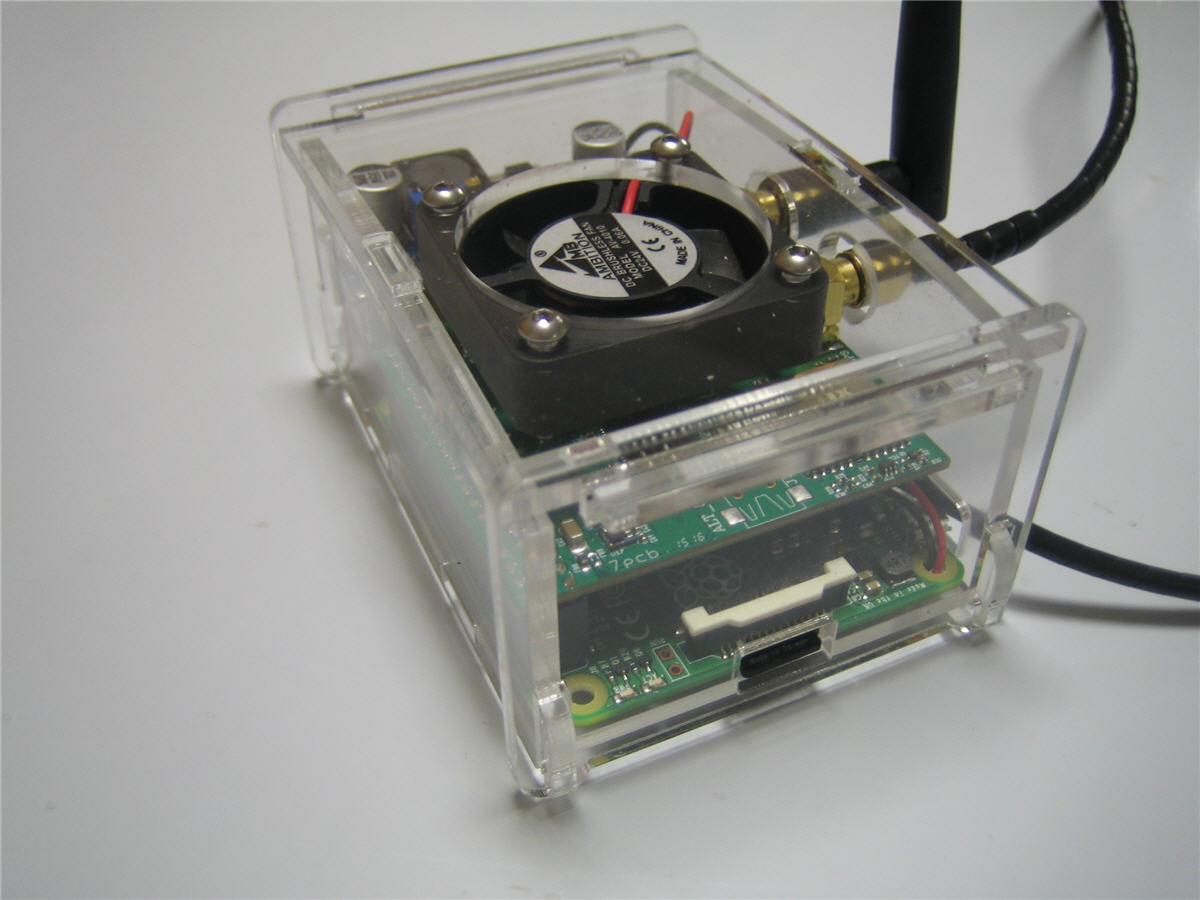
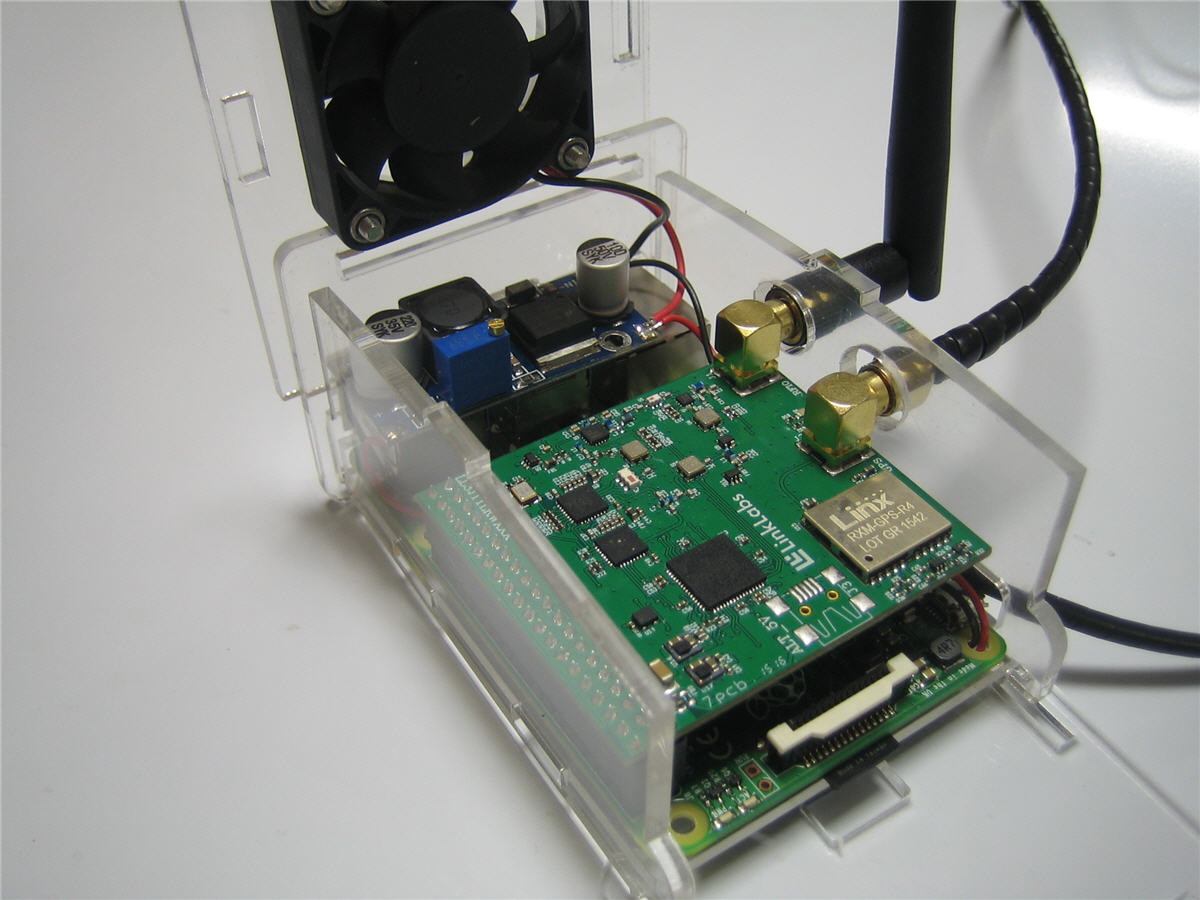
The fan is a 24V fan. Since the fan runs fast enough from a 12V supply, this gives me a wide range of power adapters I can use. Anything from 12-24V works. The perfect solution for a development solution that protects the Pi and LinkLabs board.
I found the original case for the HiFiBerry+ board on Thingiverse. I adapted the original to include the correct holes for the antenna connectors and the fan and uploaded the result. You can download the files from thingiverse thing:1627915
Note: the gateway does run without a fan but gets hot. Without a fan installed the case becomes warm (about 40°C) on the bottom and the LinkLabs board reaches temperatures of about 75°C when running for multiple days.