Unboxing
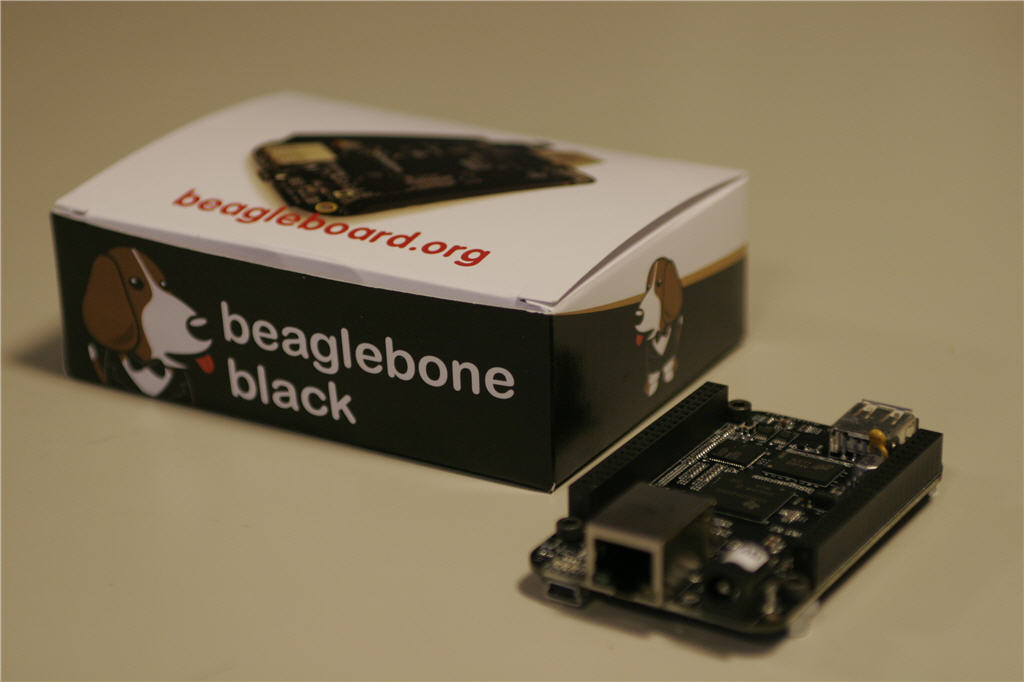
Unboxing an Apple is kind of an experience that one must experience to be able to grasp the effect. But the BeagleBone is just a bone and unboxing is kind of simple.
You get a nice cardboard box with the BeagleBone Black and a USB cable. After unpacking the BBB from it's antistatic bag I am a bit confused: all images I have seen on the website show a label on the network connector to tell what kind of a board this is. I really like to know if this is an A5 (A, B or C) or even an A4 so I turned the board upside down a few time but except for a small sticker indicating that the power plug is 5V only there is nothing that could even indicate the type of board.
The cardboard box, looks more like thick shiny paper, lies somewhere in the corner of my work bench and Iit suddenly reveals the text "Rev A5C" on the side.
I almost forgot: a little card in the box tells me I should connect one end of the USB cable to the BBB and the other end to my PC, that will power the board and give me access to a mass storage device with some information.
Installing device drivers
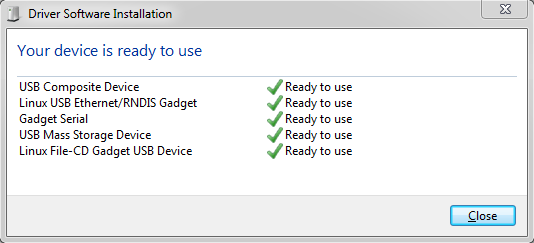
Installing the device drivers should be a simple task - and it is on a 32 bits system.
but after having done the whole tour, including the installation of the latest Ångström release, I wanted this to work on my Win7 x64 machine but the 64 bits driver package on the board is refusing to install on my system (Win7 ultimate) I later tried this on a Win7 home edition and that worked without any flaws.
If this happens to you, just go to the BeagleBoard.org site and download the drivers from there - this did the trick for me.
After installation of the drivers you get full access to the board: A new network is added to your PC with the web-server of the BBB on 192.168.7.2, a serial port (serial port over USB emulation) carries the console and the mass storage device that was already available contains some getting started stuff - very easy to use.
Installing a new Linux image
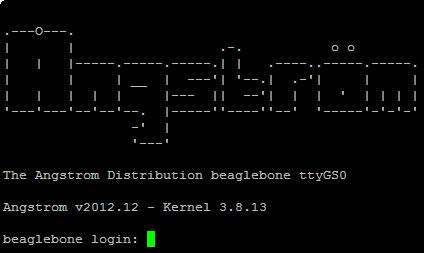
Both the BeagleBoard.org website and the webserver on the board itself suggest that I download and install a new Ångström image. So I downloaded the image, unzipped it and created a μSD card with the image. I am warned that flashing the on board eMMC can take up to 45 minutes so I pushed the correct button, applied power and waited for the LEDs to flash.
When everything is done, all 4 of the user LEDs will stop flashing. It seems to take forever and to me it looks like it takes more than 45 minutes (at least 60 minutes) before everything is completed.
After this the board still works, all drivers load as before and I have access to the webserver, console and mass storage device. The console still shows "Angstrom v2012.12" above the login prompt but typing the "uname -a" command in the console tells me this version was compiler on "Tue Jun 18 02:11:09 EDT 2013"
Adafruit-BeagleBone-IO-Python

This Beagle is Pythonized!
Time to add some fruit: Adafruit's Adafruit-BeagleBone-IO-Python.
Thanks to the easy instructions on their website, adding the Adafruit_BBIO and Adafruit_I2C packages is an easy task. If you want to install everything from source, or if you just want to have a look at the source as a reference for other projects, checkout the Adafruit_BBIO github repository.
With this module added to python you get full access to the I/O that is available on the BeagleBone Black's Cape expansion headers. Currently there is support for GPIO, ADC, PWM, I2C, SPI and UART.